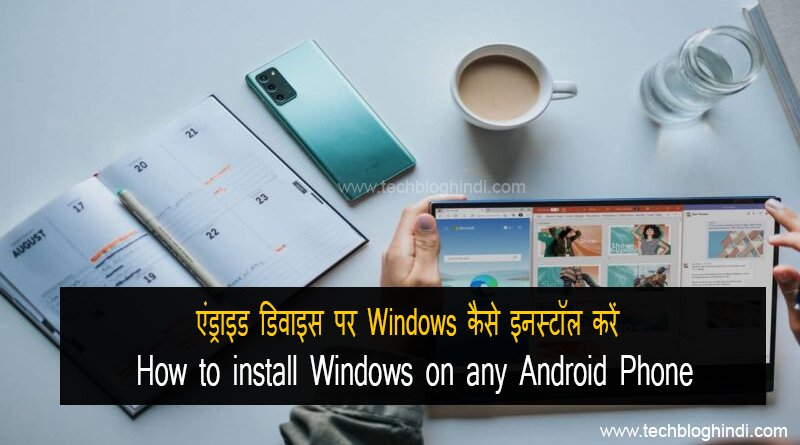
एंड्राइड डिवाइस पर Windows 10 & 11 कैसे इनस्टॉल करें
पिछली जनरेशन (Generation) की तुलना में आज के मोबाइल उपकरण बहुत अधिक Powerful हैं और यही एक प्रमुख कारण रहा है कि ये Devices हमारे जीवन का इतना बड़ा हिस्सा बन गए हैं । अब, लैपटॉप या पीसी को चालू करने के बजाय मोबाइल फोन पर बहुत सारी गतिविधियां तेजी से की जा सकती हैं । एंड्रॉइड मोबाइल डिवाइस विशेष रूप से उनके Flexibility और अनुकूलन क्षमता के लिए जाने जाते हैं जो उपयोगकर्ताओं को पसंद आते हैं। आप में से बहुत से लोग ये नहीं जानते होंगे की अब आप, अपने एंड्राइड डिवाइस पर विंडोज ऑपरेटिंग सिस्टम इंस्टॉल कर सकते हैं, जो आपके एंड्रॉइड डिवाइस पर पीसी और लैपटॉप के लिए अब तक का सबसे लोकप्रिय ऑपरेटिंग सिस्टम है। आज हम आपको बताएंगे कि किसी भी एंड्राइड डिवाइस पर Windows 10 & 11 कैसे इनस्टॉल करें ।
How to install Windows on any Android Phone (Snapdragon)
“रेनेगेड प्रोजेक्ट” (Renegade-Project) के साथ एंड्रॉइड उपकरणों पर विंडोज install करना आखिरकार संभव है। इस project को हर किसी से बहुत अधिक ध्यान और समर्थन मिल रहा है, इसे अपने एंड्रॉइड डिवाइस पर इंस्टॉल करके आप अपने एंड्रॉइड डिवाइस पर सभी पीसी गेम खेल सकते हैं। उदाहरण के लिए, आप GTA 4 और कई अन्य जैसे गेम खेल सकते हैं।
Requirements
- Renegade-Project supported device, Check the list here.
- Basic Computer Knowledge.
- Always make a backup.
एक USB flash ड्राइव ( पेन ड्राइव ) में सभी फाइल्स को डाउनलोड करे :
Download the PE 20h2pe_new.zip Password:1234
Download the dism++ Dism++
Download the SDM845 Drivers GitHub WOA-Drivers.
Now extract drivers for device, check README.
Download the Windows 10 arm64 iso UUP dump.
Download the UEFI Releases · edk2-porting/edk2-sdm845 · GitHub
Download the parted parted
एक टेक्स्ट फाइल क्रिएट करें , और नीचे दिए गए कमांड्स को अपने फ़ोन में copy-paste करें .
diskpart
select disk 0
list part
select part 17    # 17 is the number of your ESP partition
assign letter=Y
exit

bcdedit /store Y:\efi\microsoft\boot\bcd /set {Default} testsigning on
bcdedit /store Y:\efi\microsoft\boot\bcd /set {Default} nointegritychecks on

shutdown -s -t 0
आपको कुछ devices के लिए कुछ और Steps की आवश्यकता हो सकती है इसलिए आप अपने सपोर्टेड डिवाइस की लिस्ट ऊपर दिए गए लिंक्स से चेक कर सकते है । जिसके किये आप Renegade Project के आधिकारिक गाइड (official guide) को Follow कर सकते हैं।
Create Partitions
सबसे पहले, आपको अपने डिवाइस पर TWRP इंस्टॉल करना होगा। आप Google पर अपने डिवाइस का नाम +TWRP खोज कर ऐसा कर सकते हैं । दिए गए guideline का पालन करके आप अपने एंड्राइड डिवाइस पर TWRP रिकवरी को फ़्लैश कर सकते है ।
अब TWRP रिकवरी को Enter करें और अपने डिवाइस को पीसी से कनेक्ट करें ।
CMD को as admin ओपन करे और नीचे दिए गए कमांड को रन करे |
adb push parted /sdcard/
adb shell
-
- अपने डिवाइस को दुबारा Repartition करें .
cp /sdcard/parted /sbin/ && chmod 755 /sbin/parted
umount /data && umount /sdcard
parted /dev/block/sda
rm 17
mkpart esp fat32 6559MB 7000MB
mkpart pe fat32 7000MB 10000MB
mkpart win ntfs 10000MB 70GB
mkpart userdata ext4 70GB 125GB
set 17 esp on
quit
-
- अब आपको अपने सभी नए पार्टीशन को फिर से format करना है ।
mkfs.fat -F32 -s1 /dev/block/by-name/pe
mkfs.fat -F32 -s1 /dev/block/by-name/esp
mkfs.ntfs -f /dev/block/by-name/win
mke2fs -t ext4 /dev/block/by-name/उसेरदाता
-
- Now Mount PE partition as /mnt
mount /dev/block/by-name/pe /mnt -
- Connect your USB to device’s OTG after that copy PE
cp -r /usbstorage/20h2pe_new/* /mnt - उसके बाद TWR Option के साथ सिस्टम को रीबूट करें।
- अब पहले Android ko Boot करें। अगर यह काम कर गया, तो हम आगे के स्टेप्स के लिए बढ़ सकते हैं।
किसी भी Android पर Windows Install करें | Install Windows on any Android
अब डिवाइस को Fastmode पर Reboot करें
- Simply Boot UEFI
fastboot boot boot-DEVICE.img
- Now Enter the Windows PE
- After that Assign the Y letter to ESP partition:
- diskpart
- select disk 0
- list part
- select part 17
- assign letter=Y exit
- Now we are finally here, All you have to do is install Windows ARM64.
- Launch dism++ to install Windows:
- Open File >> Apply Image
- Select the iso file location.
- Select the
C:\root (orD:\ifC:\is PE partition), the destination where windows needs to installed. - Now make sure to check
Add Bootoption. - Click ok, Now you have to wait for the image to be applied.
- Now you have to Install drivers:
- After everything is done, select the new Windows installation from the top and then click
"Open Session" - Go to the drivers section under Control Panel.
- Click Add and navigate to the SDM845 Drivers folder.
- Wait until the drivers are installed.
- After everything is done, select the new Windows installation from the top and then click
- Activate the Test-Signing mode.
bcdedit

/store Y:\efi\microsoft\boot\bcd /set {Default} testsigning on bcdedit

/store Y:\efi\microsoft\boot\bcd /set {Default} nointegritychecks on- Now Reboot to UEFI.
- Enjoy your Windows on android device: !
shutdown -s -t 0
